- Overview
- Using this knowledge base
- Signing In
- Navigating Merchant Central
- Understanding user roles and permissions
- Downloading the mobile app
Overview
Merchant Central is NMI’s purpose-built merchant management platform, developed through years of experience supporting the full payments lifecycle—from lead tracking and merchant boarding to residual management and portfolio monitoring.
With 50+ processor and service integrations, Merchant Central provides ISOs, banks, payfacs, and other payment providers with a centralized system to manage operations and eliminate manual or disconnected workflows. The platform includes configurable sales and lead management tools, streamlined digital onboarding, automated underwriting through solutions like ScanX, and comprehensive residual and portfolio tracking.
Designed to adapt to each organization’s unique workflows, Merchant Central helps teams improve efficiency, accelerate approvals, strengthen merchant retention, and simplify portfolio oversight—all within a unified CRM built specifically for the payments industry.
Using This Knowledge Base
This knowledge base provides guidance and resources to help you navigate Merchant Central and get the most value from its features.
Content is organized into four primary sections, accessible from the home page:
- Getting Started User Guides: Role-based overviews of CRM tools and features for Sales Representatives, Sales Managers, Operations & Support users, and Administrators.
- CRM Administration: Configuration and management guidance for administrators to align the CRM with organizational workflows.
- Monthly Release History: Summaries of monthly product updates and newly released features.
- Additional Resources: Product webinars, system status pages, and troubleshooting tools.
Throughout the knowledge base, you’ll find screenshots that visually support key concepts and workflows. Click any image to enlarge it, then click outside the image or press Escape to close it.
Helpful side notes are marked with ℹ️, and practical usage tips are marked with 💡.
If you’re new to Merchant Central, start with the appropriate Getting Started guide below before exploring more advanced articles:
- Getting Started Guide for Sales Reps
- Getting Started Guide for Sales Managers
- Getting Started Guide for Operations & Support
- Getting Started Guide for Administrators
If you have questions or need assistance, contact our Support team using the Help icon in the CRM or email us at support@iriscrm.com.
ℹ️The Merchant Central user interface was updated in 2024 with a modern, responsive design to improve usability and speed. The new interface is referred to as "v2," while the legacy interface is referred to as "v1."
ℹ️Some non-critical areas still use the v1 interface and will be gradually transitioned to v2.
Signing in
Your organization will provide your Merchant Central login URL. Once on the login page, enter your username and password and click Log In:
If your organization has enabled Single Sign-On (SSO), an SSO button will appear, allowing you to authenticate using your identity provider.
Password Reset
If you forget your username or password, click Forgot Username or Password below the login button. You’ll be guided through retrieving your username or resetting your password.
Password Requirements
Your password must meet the following criteria:
- Minimum 12 characters
- At least 1 number, 1 special character, 1 uppercase letter, and 1 lowercase letter
- Cannot start or end with a space
- Cannot match any of your last 4 passwords
Passwords rotate every 90 days.
ℹ️If you use 2FA with OTP authentication, password rotation is not required.
Unlocking User Account
After five incorrect password attempts, your account will lock. To unlock it, request an identification code to be sent to your registered email address or mobile number.
Enter the code in the Code field and click Confirm Identification Code. Once confirmed, you can create a new password.
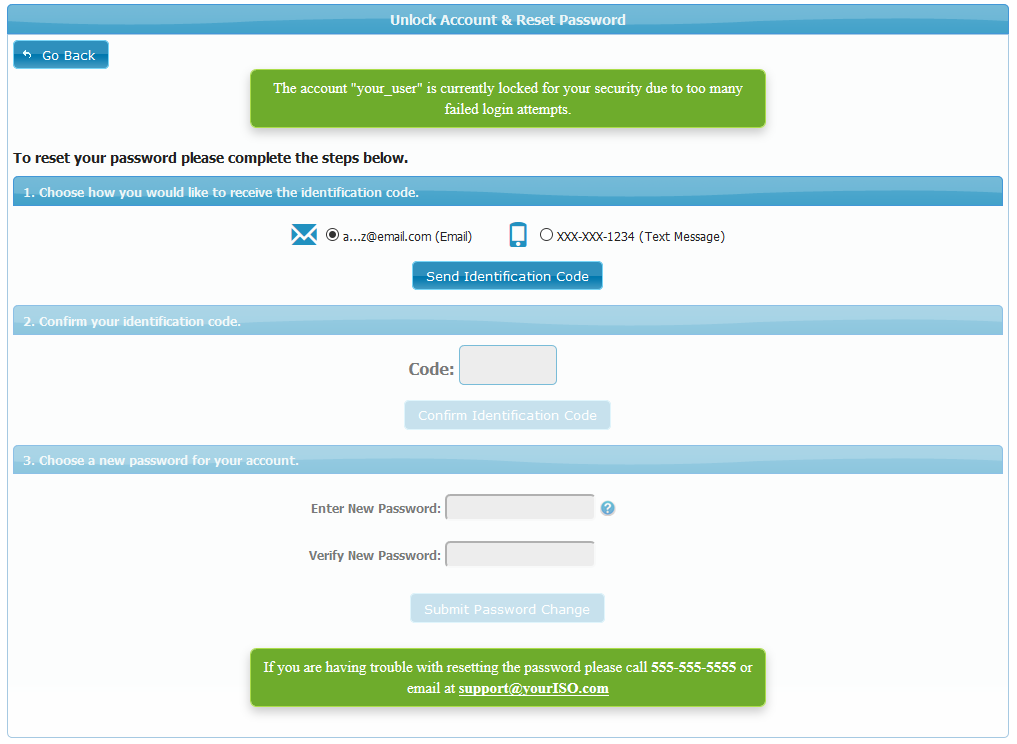
ℹ️Your CRM Administrator can also unlock your account manually.
Navigating Merchant Central
Below is an example of the home page you’ll see after logging in:
On the left is the collapsible sidebar menu, which provides access to the various areas of the CRM.
ℹ️Items with a downward arrow (⌄) contain sub-menus. Click the arrow to expand them, or click the item to open its page.
Near the top of the sidebar is the Create button, allowing you to quickly create a new Lead, Ticket, Merchant, or other CRM objects.
Home Page
The home page displays several dashboards across multiple tabs, giving you a bird’s-eye view of your portfolio and sales performance. You can customize the displayed tabs to show the information most relevant to you.
Learn more: Home Tabs
Global Search Field
The Global Search field allows you to search across the entire CRM—quickly finding Leads, Merchants, Tickets, and Documents. It also shows your most recently viewed items for faster access.
Learn more: Global Search Field
CRM Quick Actions
Next to the Global Search field are the CRM Quick Action icons, which allow you to communicate with users, issue voice commands in the CRM, access notifications, and contact support.
Here is a description of the five icons (left to right):
- Support Chat: Contact the Merchant Central support team via live chat.
- Voice Control: Use voice commands (e.g., “Create new lead,” “Search ABC”). Learn more: Using Speech Recognition
- Internal Chat: Chat with users and groups using the built-in messenger. Learn more: Merchant Central Chat
- CRM Dialer: Call your prospects using the integrated Dialer. Learn more: Introduction to the Dialer
- CRM Notifications: View and manage your system notifications.
Manage personal settings
You can manage your personal CRM settings using the menu under your username in the top-right corner. This menu also includes help resources and the option to log out.
Menu options include:
- Settings: Manage your user, notification, calendar, and API settings. Learn more: User Settings and Notifications
- View As (Admins only): View the CRM as another user for troubleshooting. Learn more: Using "View As"
- Give Feedback: Submit feature requests or bug reports and vote on others’ feedback. Learn more: Sending Feature Requests and Bug Reports
- CRM Assistant: Search the knowledge base directly from within the CRM.
- Custom Style: Customize your CRM color theme or apply group themes. Learn more: Custom Styles
- Help: Display relevant help materials for the page you're viewing.
- Get Mobile App: Access QR codes to download the iOS or Android app.
- Switch to Legacy View: Switch to the v1 interface if needed.
Accessing company documents
Company documents, forms, and training materials can be shared with all users from the Documents page. Documents can be organized into categories and configured with access permissions.
Learn more: Viewing the Documents Page
You can also create training slideshows and announcement pop-ups and display them to selected user classes.
Learn more: Slideshows and Pop-Ups
Understanding user classes and permissions
User class permissions define what each person can see and do in the CRM. Basic, Advanced, and Administrator classes help you assign the right access level for every role, keeping your system secure and ensuring users only interact with what they need.
You can create or update user classes, fine-tune permissions, and configure rules such as automatically disabling inactive users.
Learn more: Controlling Access with User Class Permissions
In addition to user class permissions, the CRM offers other permission types—such as document label, group, residuals, and e-sign/web form permissions—to manage access to specific records and CRM features.
Downloading the mobile app
Merchant Central is also available on iOS and Android devices.
Learn more: Merchant Central Mobile App