TurboApp allows you to seamlessly board new merchants directly to Worldpay Vantiv processor. To set up the integration, please see this article: Worldpay Vantiv Integration Guide
Starting the TurboApp
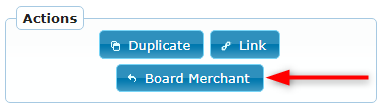
To board an account in TurboApp, we recommend clicking the Board Merchant button on the lead:
When you board a merchant to TurboApp from a lead, the lead field info, attached files, and assigned users will automatically populate into the new TurboApp record based on the TurboApp field mappings.
To start a new and empty TurboApp application, navigate to TurboApp > New Application in the top navigation bar. When you're starting a new application from the top navigation bar, you will need to enter all of the information and settings manually. This method is only recommended if you don't already have a lead to go with the account, but that should not be common.
The New Application page will open as shown in the below example:
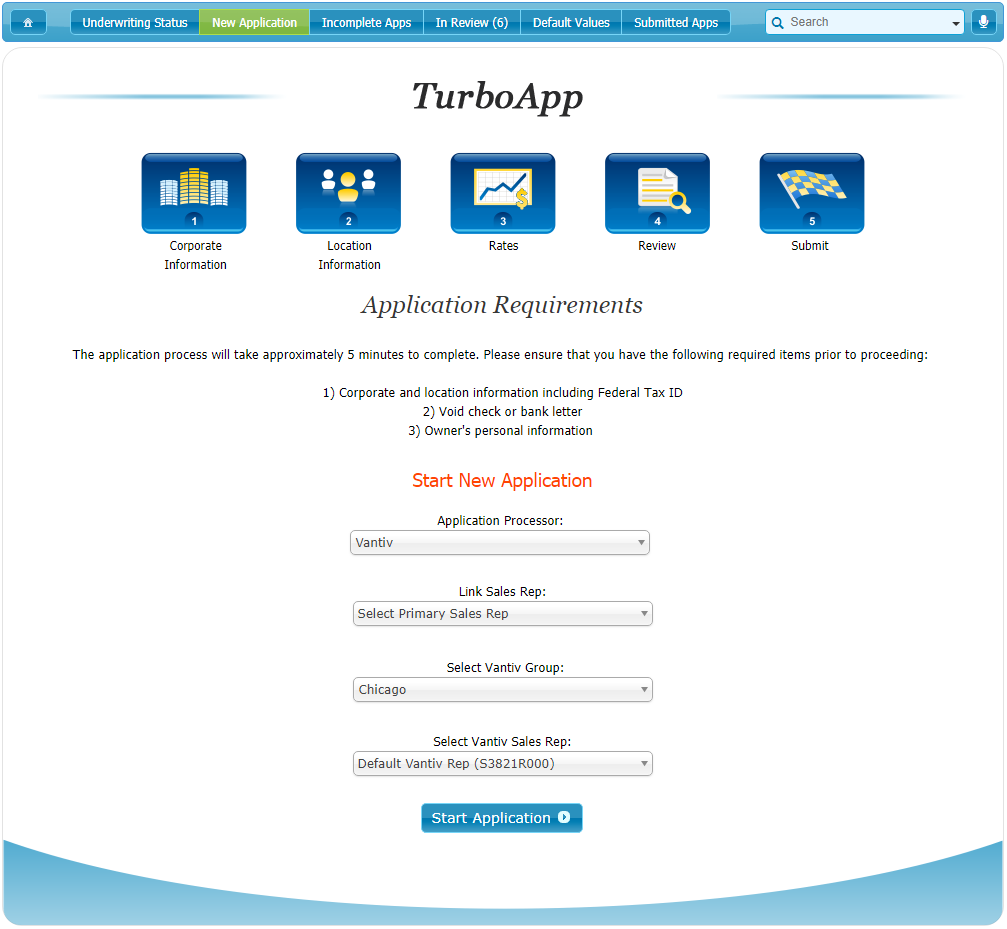
Select the appropriate options in the initial drop-down menus and click the Start Application button to launch your new application.
Note: If you have multiple processor integrations enabled, make sure to select Worldpay Vantiv in the first drop-down menu on the page.
The application process consists of several steps that take about 5 minutes to complete.
If needed, you can leave at any point and find the saved record under TurboApp > Incomplete Apps.
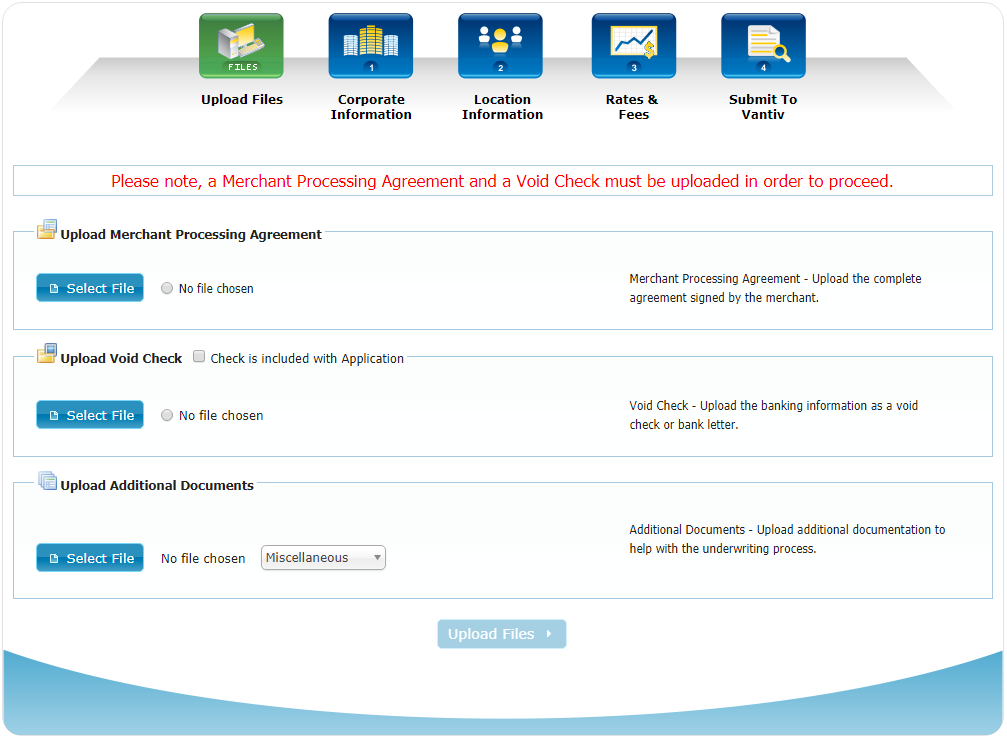
Step 1. Upload Files
In the first step of the application process, you will need to upload your Merchant Processing Agreement and a Void Check to the TurboApp.
If the void check is included in the Merchant Processing Agreement, then you may only upload the agreement (and select the Check is included with Application checkbox).
If needed, you may also upload additional supporting documents to be included with your application. Once all required documents have been selected, click the Upload Files button.
After the files have been uploaded successfully, the application will move on to the second step.
Below is a screenshot of the Upload Files page:
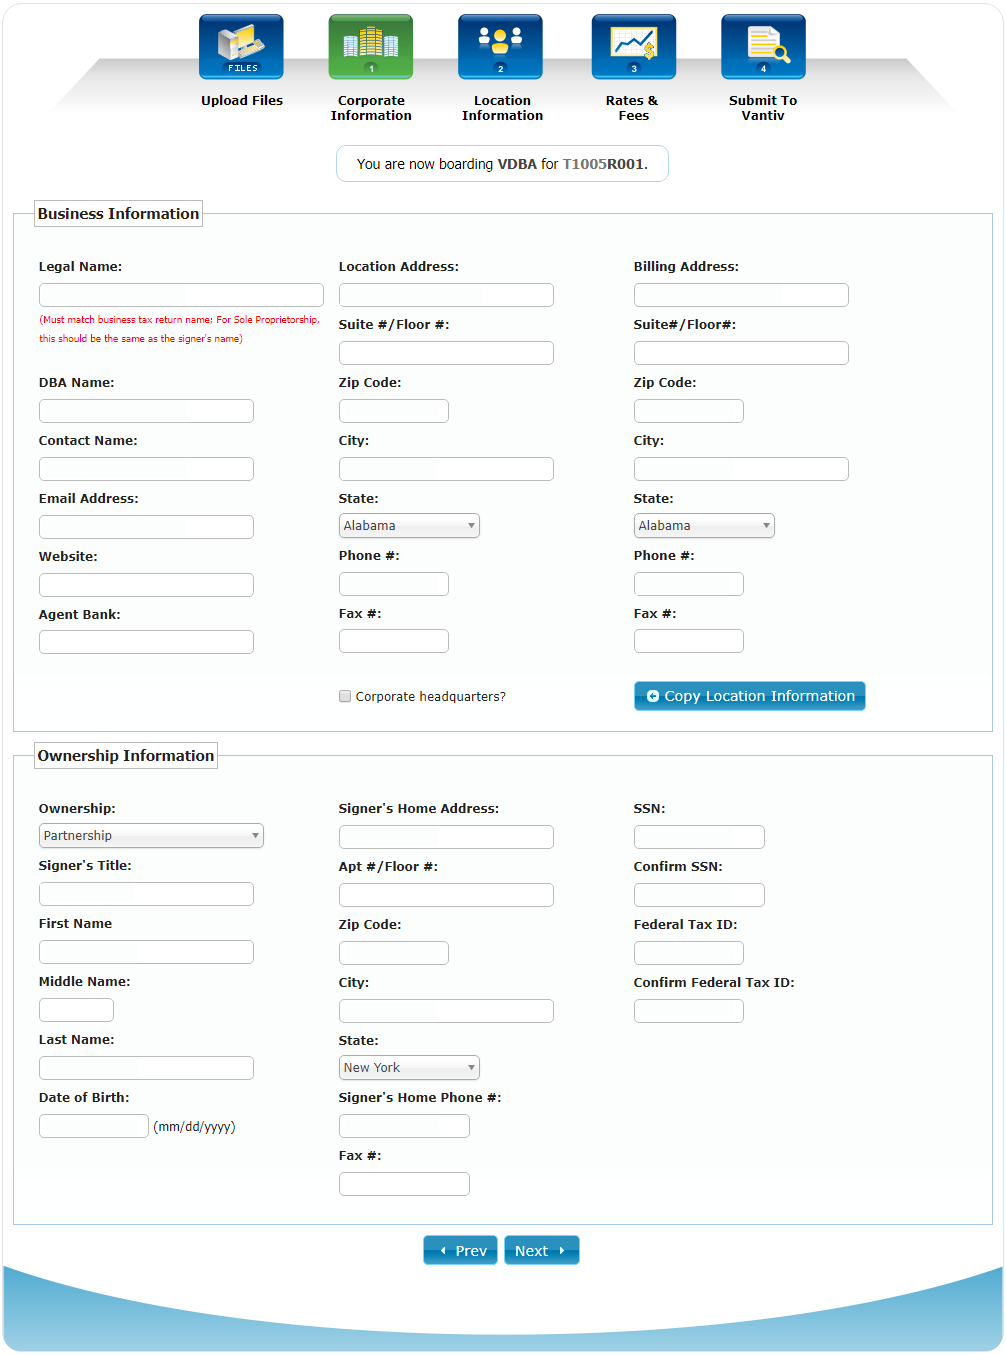
Step 2. Corporate Information
In the second step, you'll need to enter the merchant's corporate information.
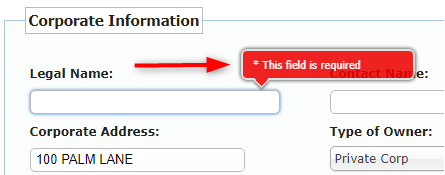
Note that most of the fields on this page are required and you'll need to fill all of them in.
If you omit to fill in a required field, then a warning message will appear when you try to move on to the next step:
Tip: After entering all necessary data in the Corporate Information section, you can copy the name and address fields from that section into the Location Information section using the Copy Location Information button:

After all of the required and relevant data is entered, click the Next button to proceed to the next step.
Below is a screenshot of the Corporate Information page:
Step 3. Location Information
In the third step, you will need to fill in the various types of information on the merchant's business. The information is grouped into the following sections:
- Business Profile
- Sales & Card Information
- PCI Compliance Information
- Bank Accounts
- Site Inspection
- Equipment Setup
- Front-End Authorization Network
- Advanced Processing Flags
Business Profile
In the Business Profile section, you can enter the basic information on the merchant's business:
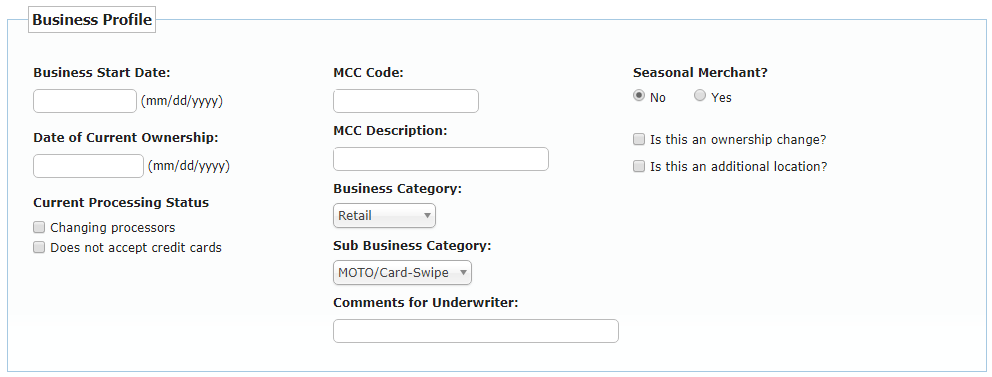
The following fields are required:
- The Business Start Date
- Date of Current Ownership
- SIC Code
Sales & Card Information
In the Sales & Card Information section, you can enter the merchant's sales stats:
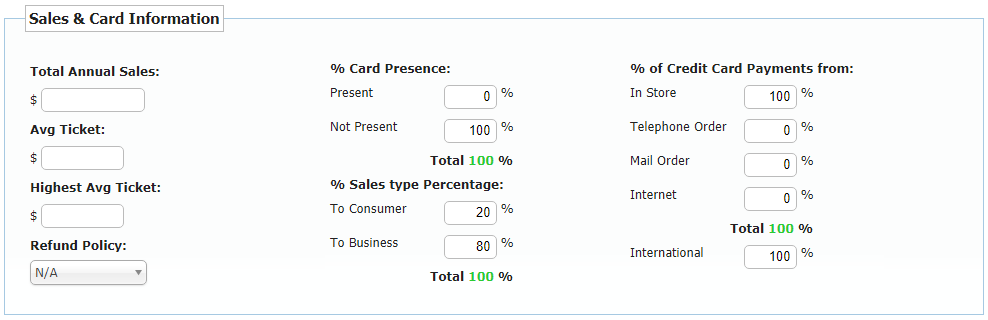
Note that each of the three percentage areas must total 100%.
If any of these areas do not add up to 100%, then the percentage sum will be shown in red and it will not be possible to move on to the next step of the application process until the percentages have been corrected.
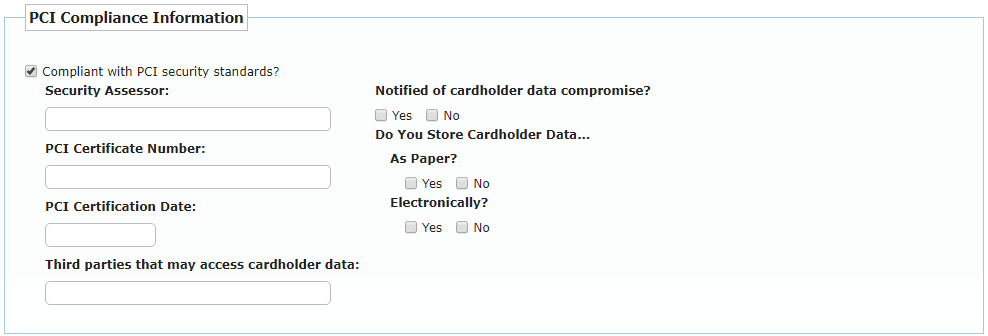
PCI Compliance Information
The PCI Compliance Information section concerns businesses that are PCI Compliant. If this is the case, select the Compliant with PCI security standards checkbox.
A series of required fields relating to the merchant's PCI certification will then open which you'll need to fill in:
Bank Accounts
The Bank Accounts section is where you fill in banking data for the merchant being boarded:
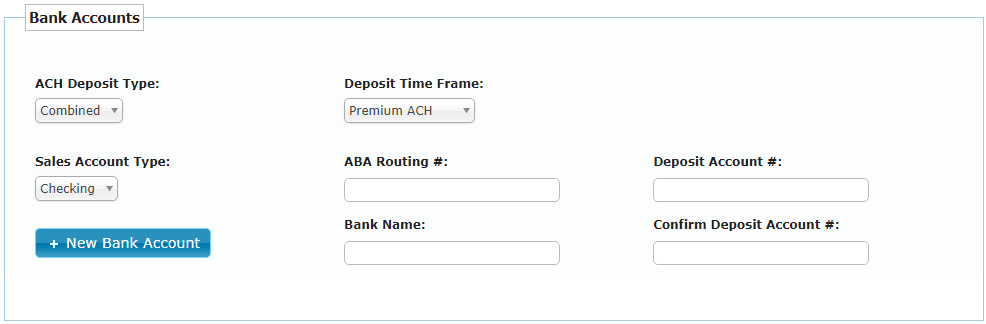
The ABA Routing Number and Deposit Information fields are required. Note that the Bank Name field will auto-populate when you enter a valid ABA Routing #:

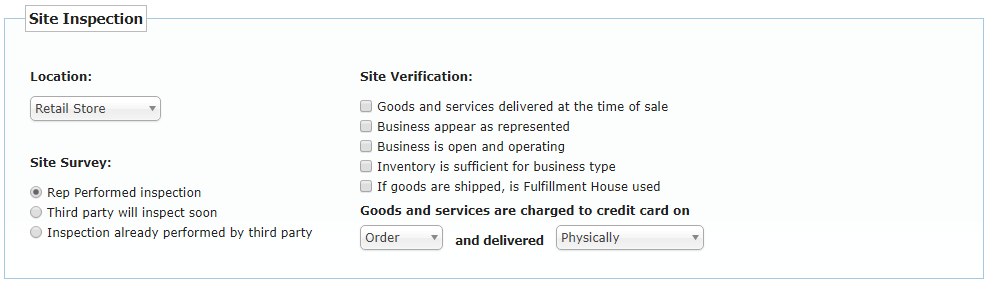
Site Inspection
The Site Inspection section concerns information relating to the merchant's physical space, inventory, and goods and services delivery methods. In order to proceed with filling in this section, you must select one of the radio buttons under the Site Survey label:
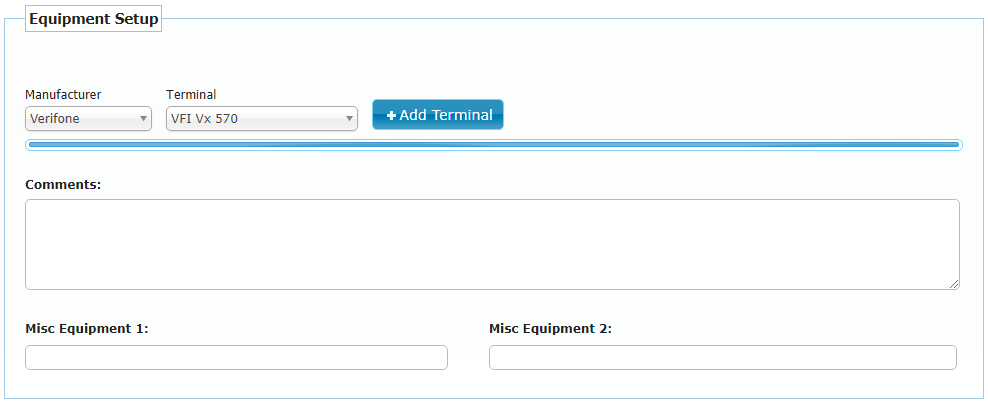
Equipment Setup
The Equipment Setup section does not contain any required fields. This section is for merchants who require setup for the equipment they own or intend to lease or purchase.
Select a Terminal from the drop-down menu (or first select a Manufacturer to limit the list of Terminal options) and click Add Terminal:
The terminal model will now appear in a green tab below the drop-down and you can then proceed to select the additional terminal options:
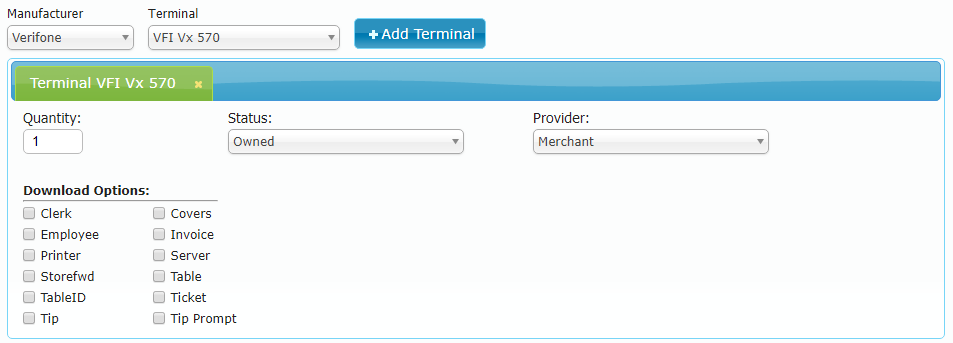
You can repeat the process to add more terminals to your application. Each new terminal will be shown on its own tab.
Front-End Authorization Network
In the Front-End Authorization Network section, select the desired Network ID:

Processing Flags
The last section on the Location Information page is the Processing Flags section:
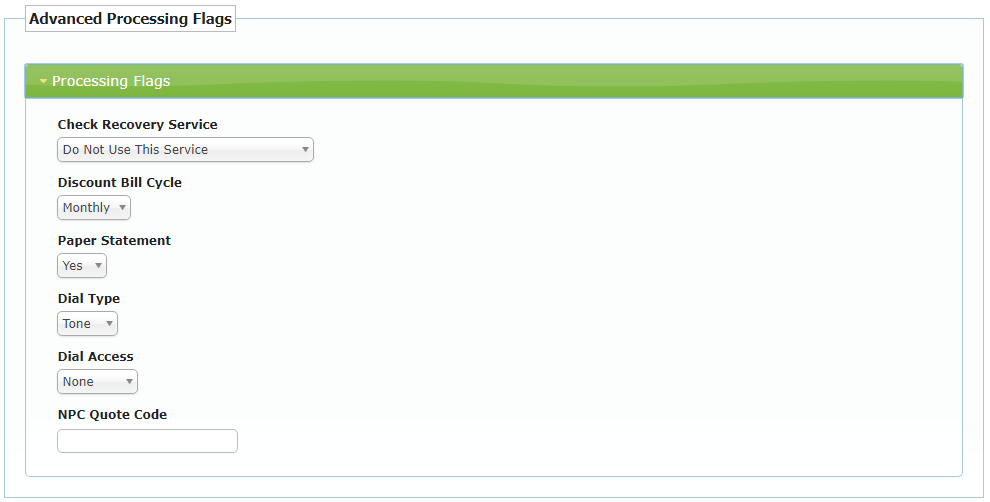
All fields in this section are optional and flags can be customized as needed.
After you finish editing all of the sections, click the Next button in order to proceed to the Rates & Fees page.
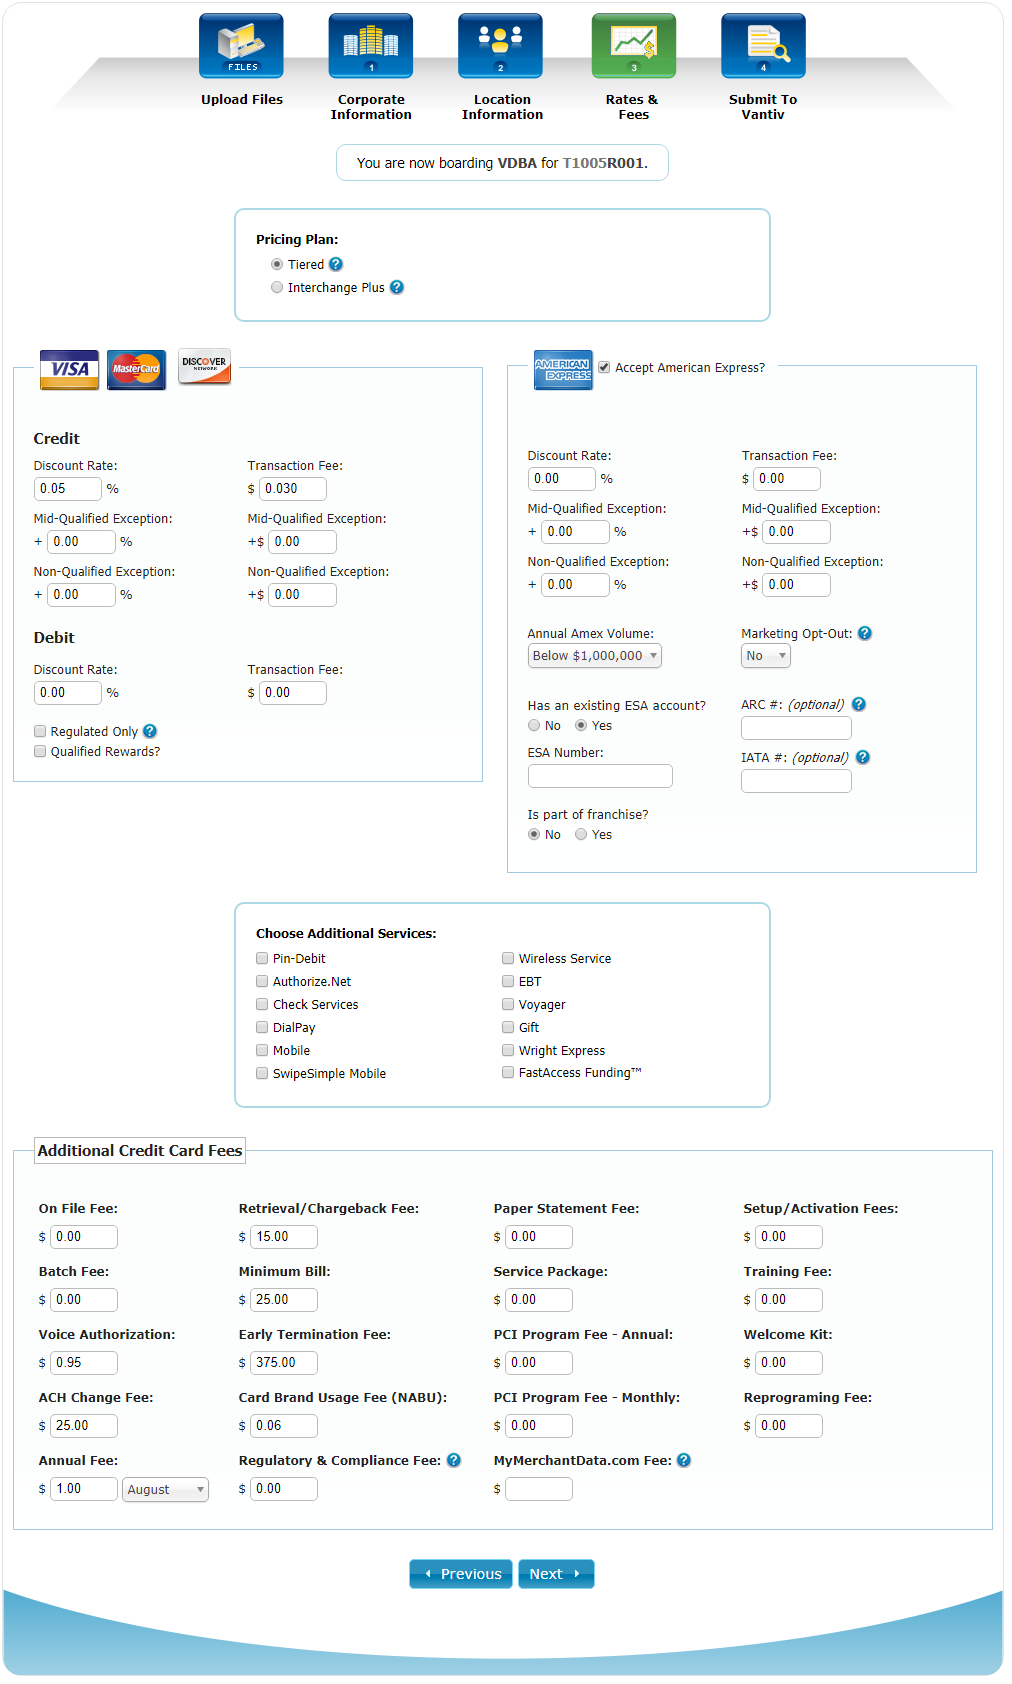
Step 4. Rates & Fees
In the fourth step, you can customize discount rates and fees for each of the four major card types as well as choose additional services such as PIN-Debit, EBT, and others.
First, select a Pricing Format from the two available options:
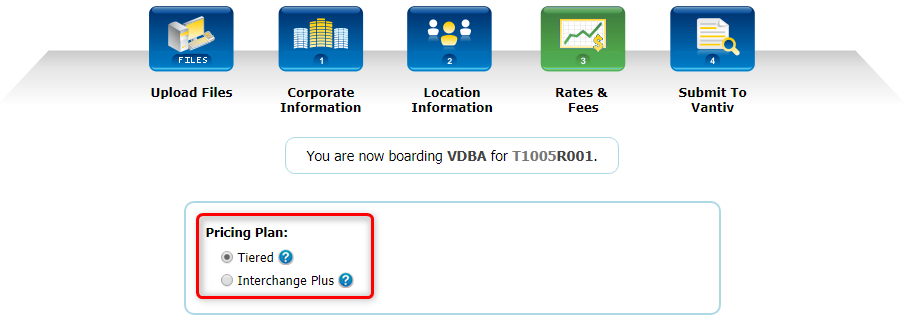
The Tiered discount rates are usually above 1.00 %, while the Interchange discount rates are usually below 1.00 %.
Once you select a pricing format, the rest of the page will automatically change and show the fields specific to that pricing format.
Note that when you select some of the options on the page (such as the Additional Services), additional fields and options will appear which you can fill in.
Once you have entered all the desired data, click Next to proceed to the last step of the application process.
Below is a screenshot of the Rates & Fees page:
Step 5. Submit to Worldpay Vantiv
In the last step, you can review your data and make any final edits before submitting:
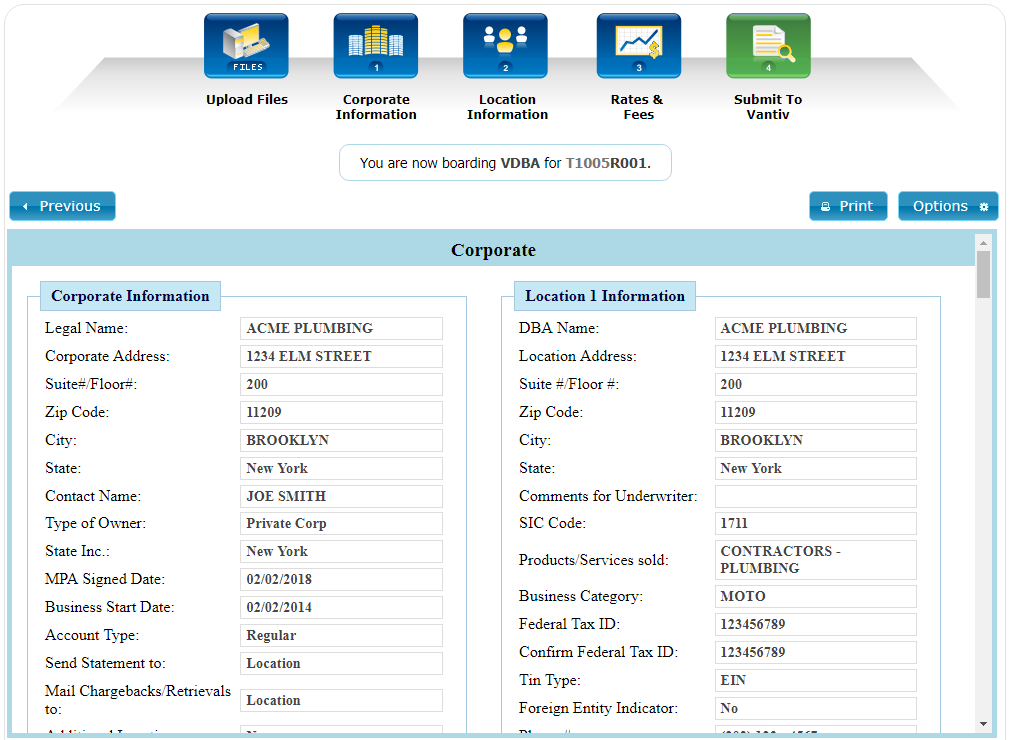
Scroll through the data via the Review Panel and check that everything is in order. If you come across any fields or sections you would like to edit, you can jump back to the desired section by clicking the button for the applicable page (located at the top of the page).
If you would like to print the page or save it as a PDF, click the Print button and select the desired settings. You can also open a dialog that will allow you to link Users or change the Sales Rep by clicking the Options button.
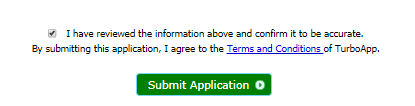
Once you have verified all data is accurate, select the Terms & Conditions checkbox and click the Submit Application button:
If there is an error blocking the submission, a red text describing the location and specific problem will appear above the Submit Application button:
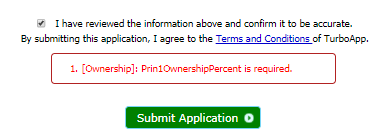
After correcting the issue, return to the Submit page, select the Terms and Conditions checkbox again, and click the Submit Application button.
If there are no additional errors, you will see a message informing you that the application was submitted successfully:
