Adding an extension, setting a caller ID, and enabling and disabling call forwarding are just some of the tasks you can accomplish quickly and easily in your Dialer settings.
Add an Extension
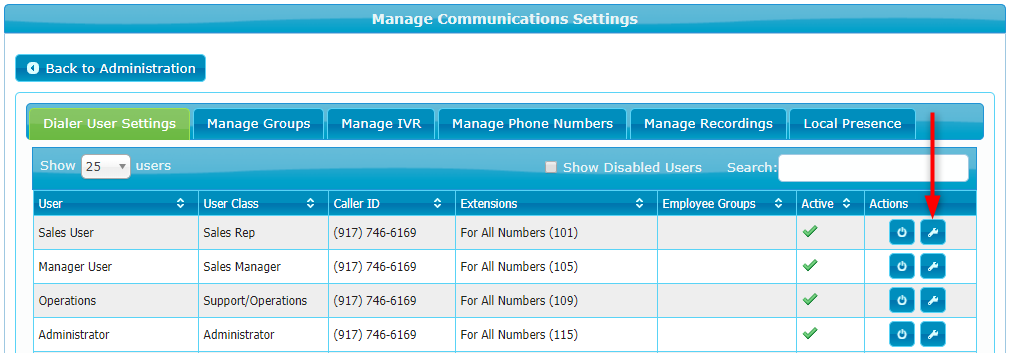
1. To add a new extension (or multiple extensions) for a specific user, go to Manage > Administration > Dialer > Dialer User Settings and click the wrench icon on that user:
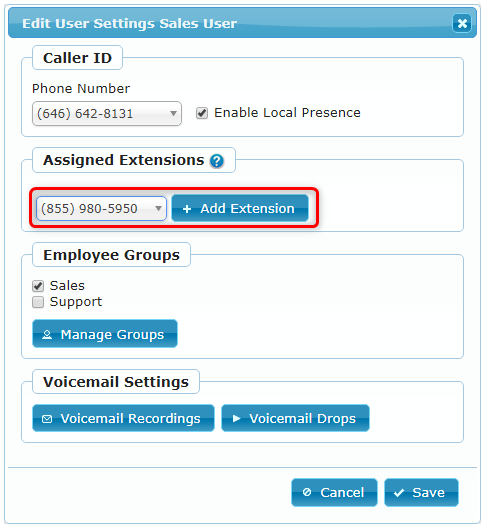
2. In the Edit User Settings dialog which opens, select a phone number from the drop-down menu in the Assigned Extensions section, and click Add Extension:
3. A blank field will open to the right of the selected number where you can enter a unique extension number. If the number you entered is an available extension, a green checkmark will appear to the right of the field:
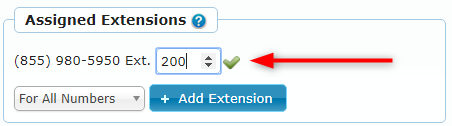
4. You can proceed to add more extensions for other phone numbers if needed. When finished, click Save on the Edit User Settings dialog and the new extension(s) will be saved.
Set Your Caller ID
1. To set a Caller ID for a specific user, go to Manage > Administration > Dialer > Dialer User Settings and click the wrench icon on that user.
2. In the Edit User Settings dialog which opens, select a number from the Phone Number drop-down menu in the Caller ID section. If needed, you can also Enable Local Presence in this section:

3. When finished, click Save and the Caller ID for outgoing calls will now display the number you selected.
Enable or Disable Call Forwarding
Call Forwarding takes direct user calls (i.e., by extension) and routes them to an outside number instead of ringing to the user in the Dialer. The user's Online/Offline status in the Dialer does not affect Call Forwarding.
1. To enable call forwarding for a specific user, go to Manage > Administration > Dialer > Dialer User Settings and click the wrench icon on that user.
2. In the Edit User Settings dialog which opens, click on the gear icon next to the Enable Forwarding checkbox:

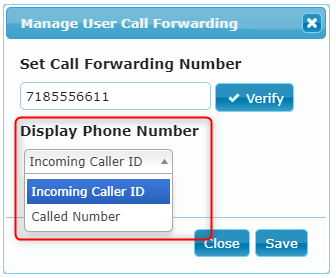
3. In the dialog which opens, enter the phone number to forward your calls to, and click Verify:

4. A six-digit confirmation code is now displayed in the popup. You will now receive a call from an automated response at the number you entered:

5. Accept the call from the automated response, and enter the six-digit confirmation code on your phone dial when instructed.
6. After you are informed that the process has completed, you can hang up the call. Finally, you can select the phone number that will be displayed for each forwarded call.
The "Incoming Caller ID" option shows the number of the person who has called you, and the "Called Number" option shows the called number (ie. your company phone number).
When you're done, click Save to close the popup:
7. Finally, select the Enable Forwarding checkbox in the Edit User Settings dialog and save and close it. All future calls to this extension will be now be sent to the verified forwarding number:
8. To disable the call forwarding at any point, open the Edit User Settings dialog again and un-select the Enable Forwarding checkbox.