Your CRM provides two choices for what a user's split percentage will be based on, Gross or Net:
- Gross – Split percentage will be set as a percentage of the ISO's regular Net / Income.
- Net – Split percentage will be set as a percentage of the Group Split.
The split for a user can be set at the merchant level from the Manage > Administration > Merchants > Merchant Management page, or from the Manage > Administration > Residuals > Templates page.
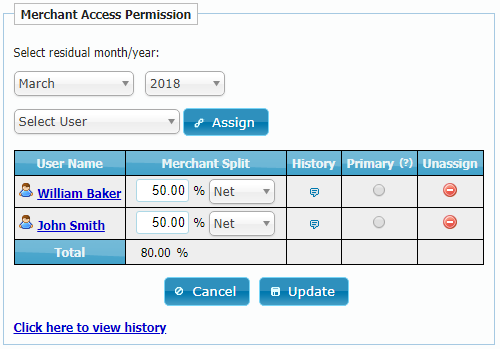
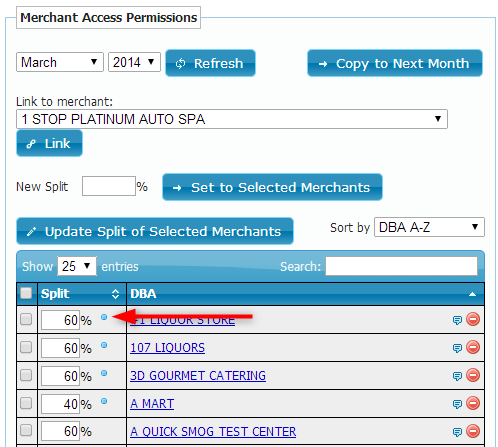
When selecting a merchant by clicking on the MID#, the user is brought to their Manage Merchant page. Merchant split assignments are displayed in the Merchant Access Permission widget on the right:
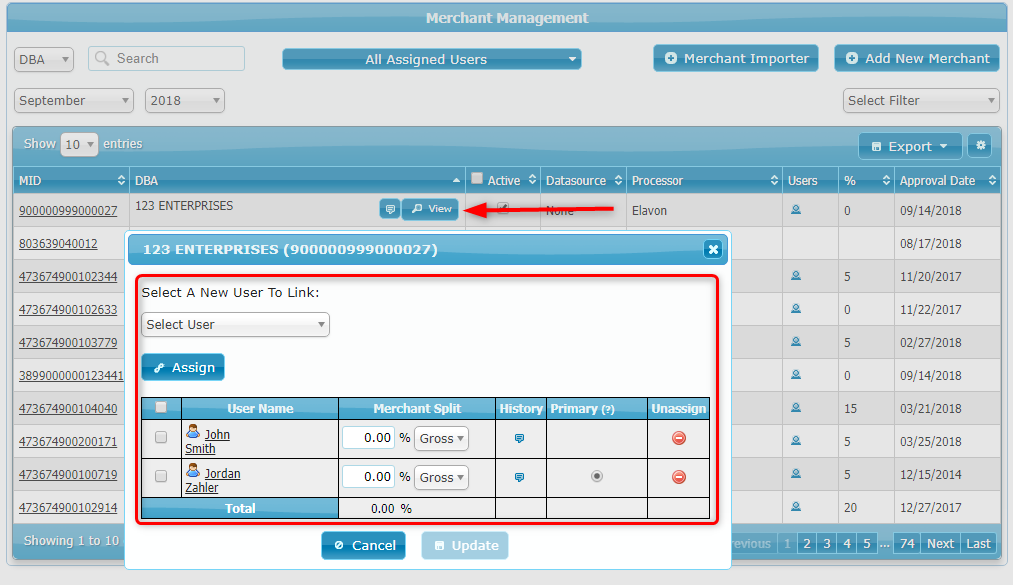
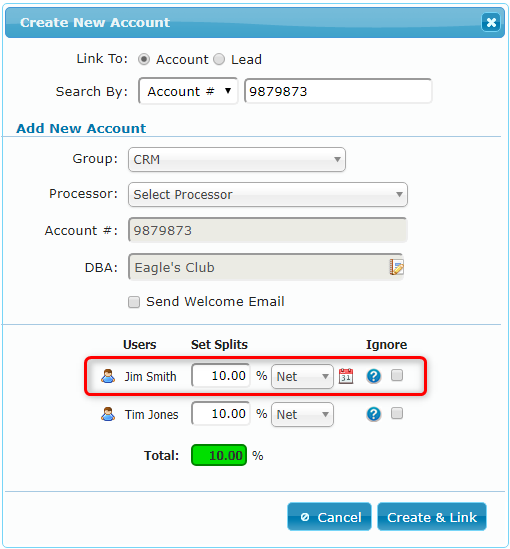
Users and splits can also be assigned to a particular merchant by selecting the View button next to the merchant’s name from the Merchant Management page:
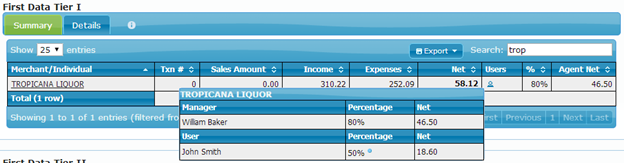
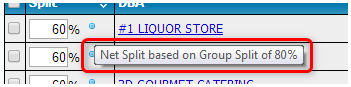
When the split type selected is Net, the CRM will display the split percentage as a calculation of Gross Split/Group Split, and give detail on the net and group split percentage:
From a user's Manager User page (and also from the residuals page), where a split percentage is set as Net (as opposed to Gross) the CRM will display a blue dot indicator next to the percentage total amount:
Hovering over the blue dot will give more detail on the split percentage:
The Net Split functionality is also available in the Group Splits tab on the Manage Residuals page.
When a group split combination is created, the user has the option to select Net as the split type:
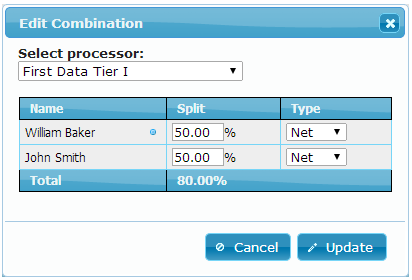
For more information on the managing group split combinations please see our article on Setting Up Residual Group Splits.
Setting Up Split Expiration Date
The user splits can be set up to expire on a specific date in the future. The split expiration dates are set for each agent individually.
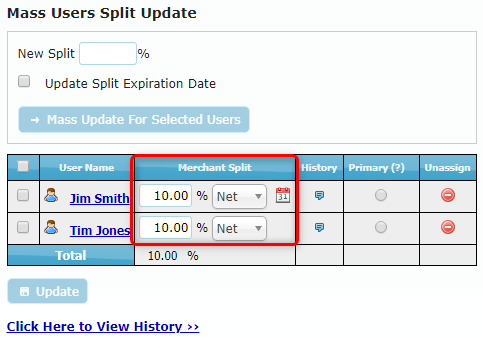
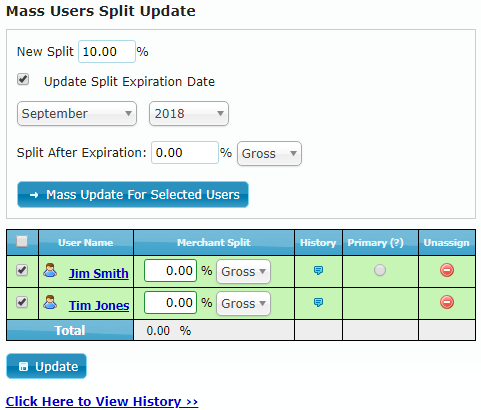
To set an expiration date, open the Manage User page for the user you wish to edit, select the merchant(s) that the user has been assigned to, and select the Update Split Expiration Date checkbox.
The expiration month and year dropdowns will then appear automatically for you to select from:
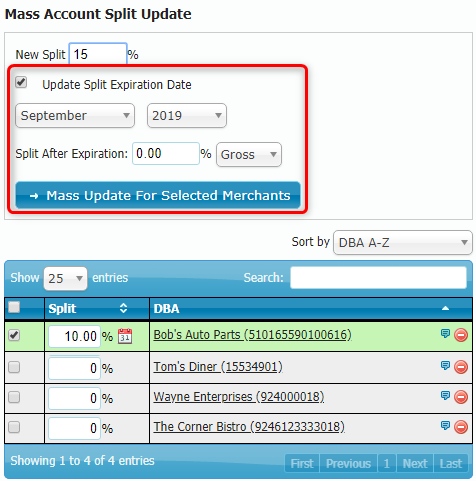
In the same section, you can also set the Split After Expiration percentage (which will kick in automatically after the split expires) and select if the split is based on Gross or Net income.
After you’ve configured the expiry options click Mass Update For Selected Merchants and the changes will be applied.
The merchants assigned to the user will now show a calendar icon in the Split column indicating an expiry date has been set for that user:
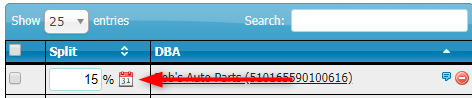
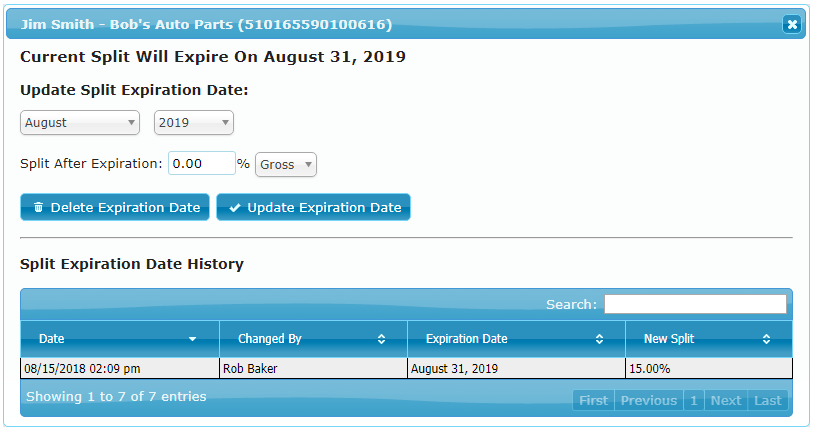
Clicking on the icon will open the split expiration popup where you can delete or update the expiration date, and view the Split Expiration Date History:
The expiration dates can also be managed from the Manage Merchant page, where you can view all of the users that have been assigned to the merchant, and configure their splits:
The split expiration dates can also be set up for users while importing merchants via the Merchant Importer.
Setting Up Default Residual Splits
On the Manage User page you can also set up the user's default residual split and expiration:
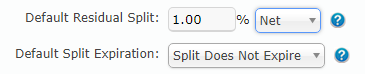
The default residual split that you set for a user will be automatically applied when the user is assigned to a merchant, or when a new account is being created using the Link action on the lead:
If you need to make an adjustment to the user split, you can always do so on each merchant individually: