As part of your initial CRM configuration, the Support Team will ensure that your residual reports are mapped so that you may upload new reports every month.
Occasionally, the column headings in your processor's reports may change, or additional columns may be added. When that happens you will need to re-create your residual mappings accordingly.
To re-create your mappings in the most efficient manner the following procedure is recommended:
- Open the original residual report mapping in one browser window.
- Open the Import Residuals page in a second browser window, and import the new/modified residual report. Once the report is uploaded, the mapping page will open up.
- Position both browser windows side by side so that you can view the original mappings in the first window, and the new report mapping page in the second window.
- Proceed to map your new report using the original mappings as a reference. If there are any new report fields that need to be mapped which were not there in the previous report, you may map those as well.
- Update the report field formats (optional) and finish uploading the new report.
Below is a more detailed description of each of the five steps listed above.
1. Viewing Your Current Mapping
To view your current mappings go to Manage > Administration > Residuals > Import Residuals, and open the Manage Mappings tab:
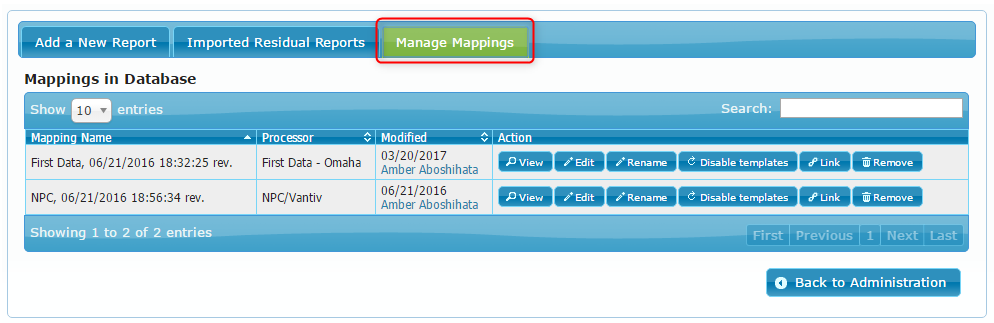
Locate the processor that you are importing the residuals report for, and click the View button:

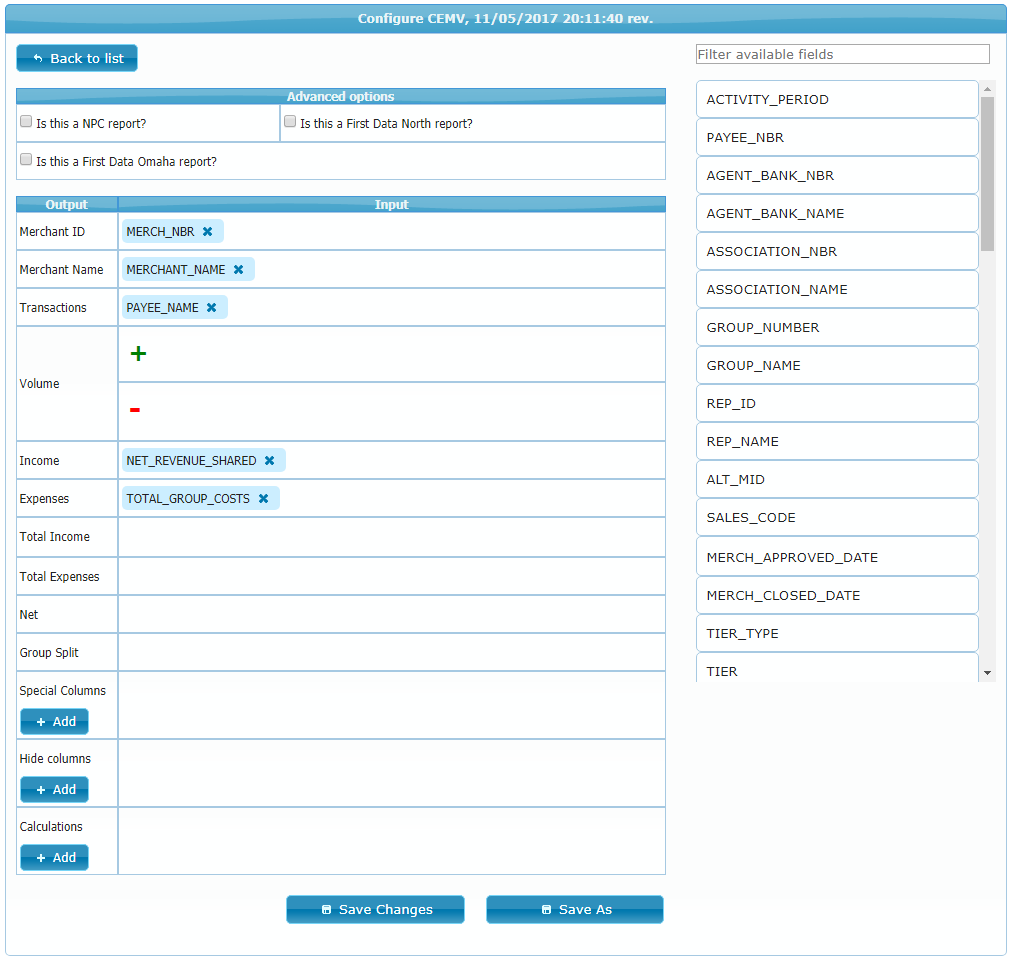
The mappings for that report will now be shown:
2. Importing the New Report
Open your CRM in a new browser window and go to Manage > Administration > Residuals > Import Residuals.
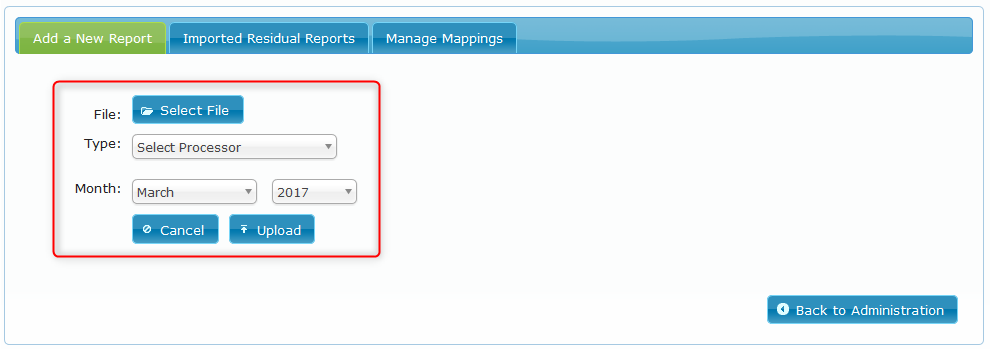
On the Add a New Report tab click the Select File button and select the report to be uploaded from your computer.
After that, select the processor, the month, and the year of the report, and click Upload:
If the column names in your new report are identical to the column names in the report that was originally mapped, then the CRM will now show the Formats page on which you can edit the field formats prior to uploading your report.
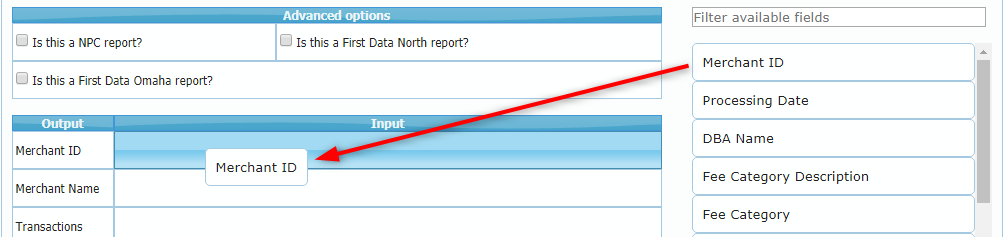
However, if the column names in your report are different from the original column names, then the CRM will open the mapping page instead, as shown in the below image:

3. Positioning Your Browser Windows
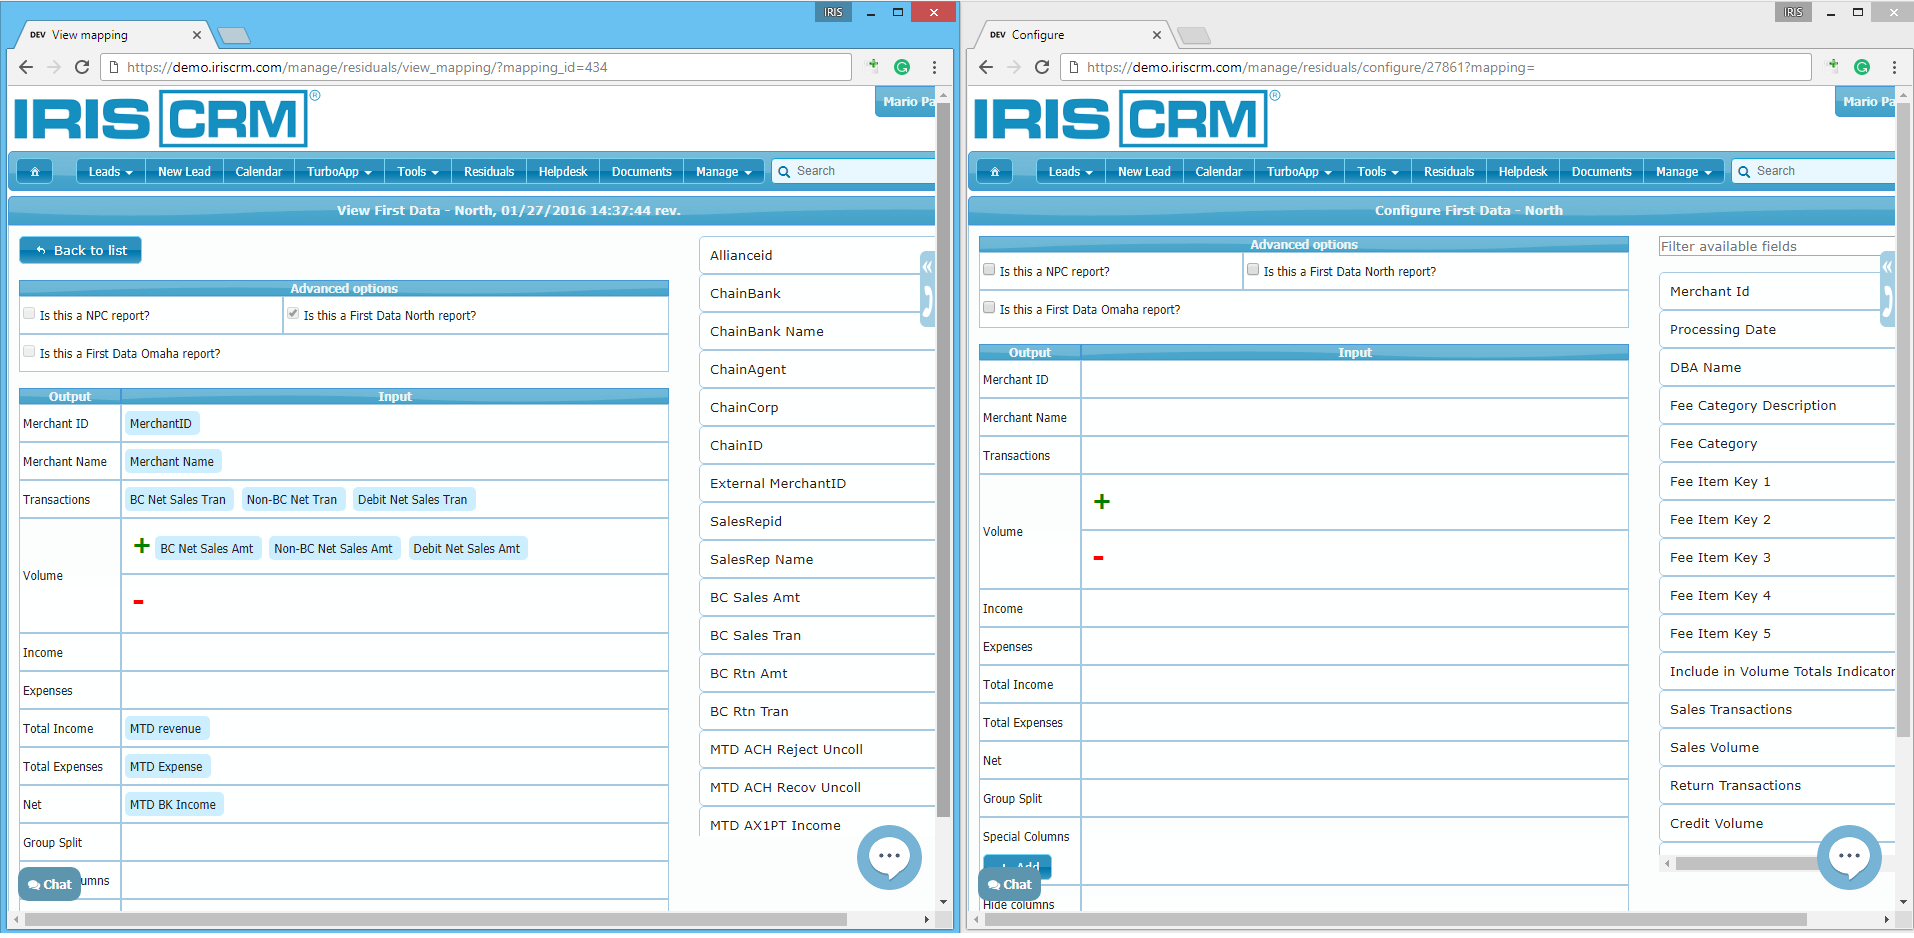
Once you have the original mappings page, and the new report mapping page opened in your browser windows, position the two windows side by side.
Tip: To position an active window on the left half of the screen in Windows 10, press Start + Left Arrow on your keyboard. After that, click anywhere in your second browser window (in order to make it active), and press Start + Right Arrow. This will position the second window on the right half of your screen.
You can now conveniently view the original mappings on the left side of your screen, and proceed to create the new mappings in the window on the right side:
4. Mapping the New Report
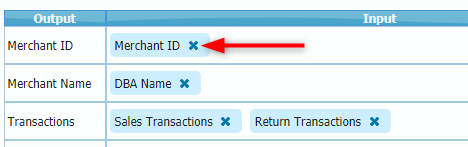
To create a new mapping, drag and drop the report column from the right side of the mapping page to the appropriate CRM residual field on the left (into the Input column):
To delete a mapping, click on the "x" sign on the column that you wish to remove:
Here is an explanation of the available CRM fields, and what report column they should be mapped to:
| CRM Field: | Map To: |
| Merchant ID | Report column containing the MID or Merchant's Account Number. Only numerical values are accepted. |
| Merchant Name | Report column containing the DBA or Merchants Name. |
| Transactions | Report column or columns that make up the total number of transactions. |
| Volume | Report column or columns that make up the total volume. Items that contribute to the volume should be dragged to the "+" section, while items that decrease the volume (e.g. credits) should be dragged to the "-" section. |
| Income | Individual income columns (optional). Adding individual income columns to this section will enable them to be modified via the CRM's Residual Templates. |
| Expenses | Individual expense columns (optional). Adding individual expense columns to this section will enable them to be modified via the CRM's Residual Templates. |
| Total Income | Report column that represents the Total Revenue (before expenses). |
| Total Expenses | Report column that represents the Total Expenses. |
| Net | Report split percentage column. You may optionally map this column if the ISO receives a percentage of the Net. The split percentage will be multiplied by the Net column. |
| Special Columns | Columns that may be used to calculate the unit cost (optional). In order to use this feature, your file must contain the total cost for the item and the number of units that contribute to the cost. |
| Hide columns | Report columns that should be excluded from the Residuals Details tab (optional). Columns mapped here will be hidden from all users. |
| Calculations | Additional calculated columns (optional). The calculated column must be based on an existing column in your residuals file. |
More info: Uploading Residual Reports