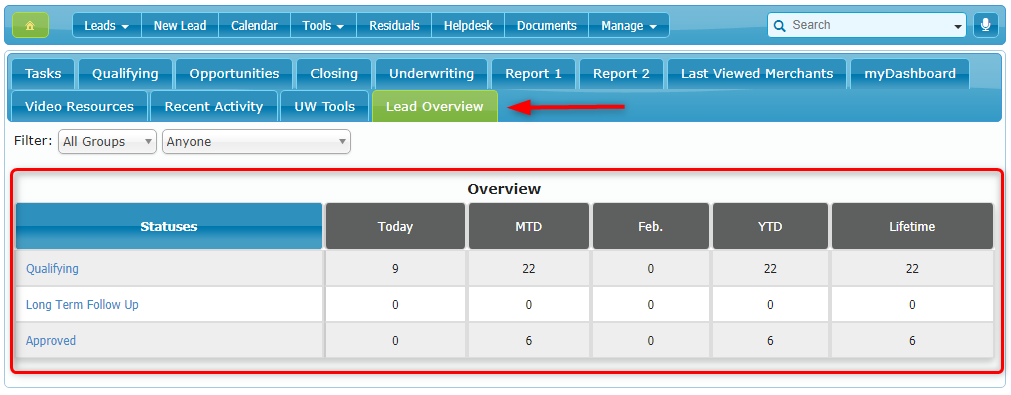
The Lead Dashboards provide you with a convenient way of viewing reports on leads in any status.
Here are the steps to create a new Lead Dashboard and add it to a Home Page tab:
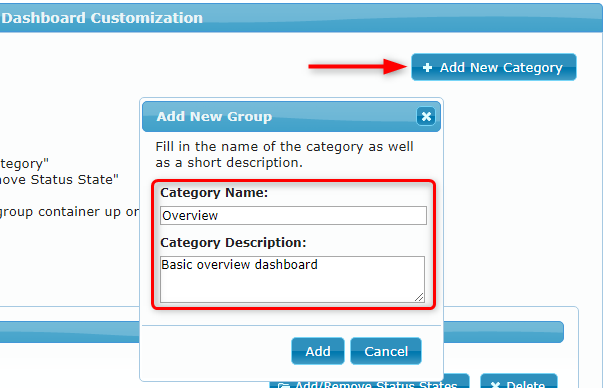
1. Go to Manage > Administration > Home Page > Lead Dashboards, click Add New Category, enter the category name and description, and click Add:
2. Find the category you just created and click the Add/Remove Status States button on it:

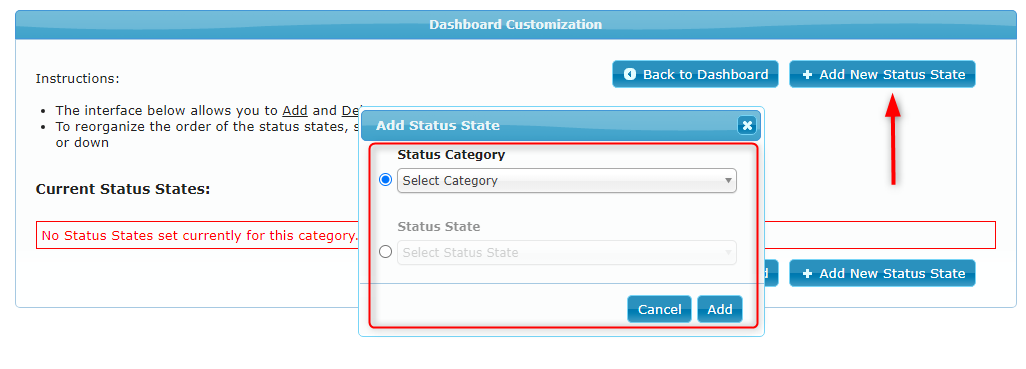
3. On the next page, click Add New Status State, select a Status Category or a Status State and click Add:
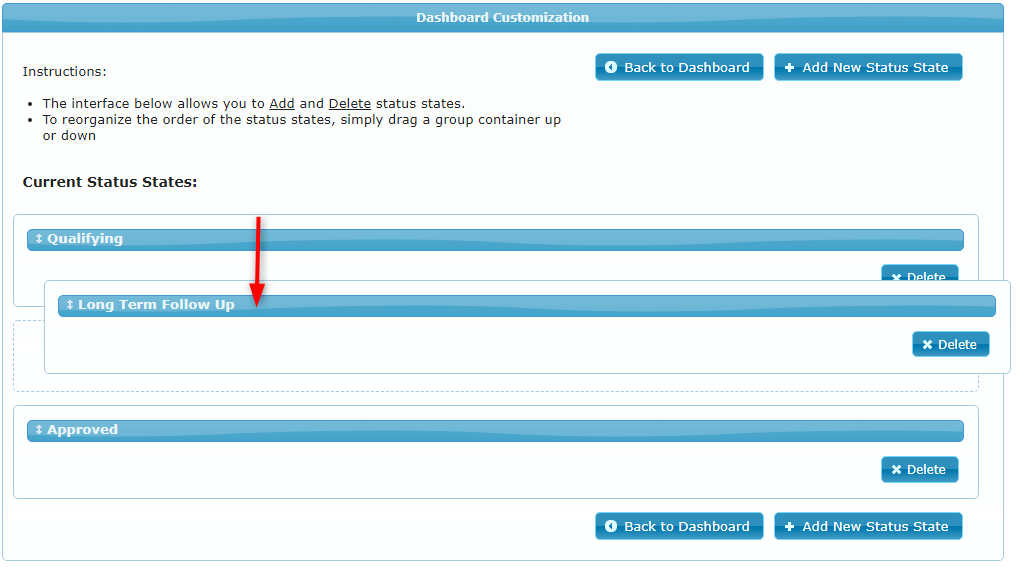
4. You may add as many many Status Categories and Status States as needed. If needed, you may also reorder your status categories and states by dragging and dropping the statuses into a new position on the list:
5. To add your new dashboard to a Home Page tab, go to Manage > Administration > Home Page > Home Tabs, find the appropriate tab, and click Add/Remove Components:

For more information on creating or managing Home Page tabs please see our article on Home Tabs.
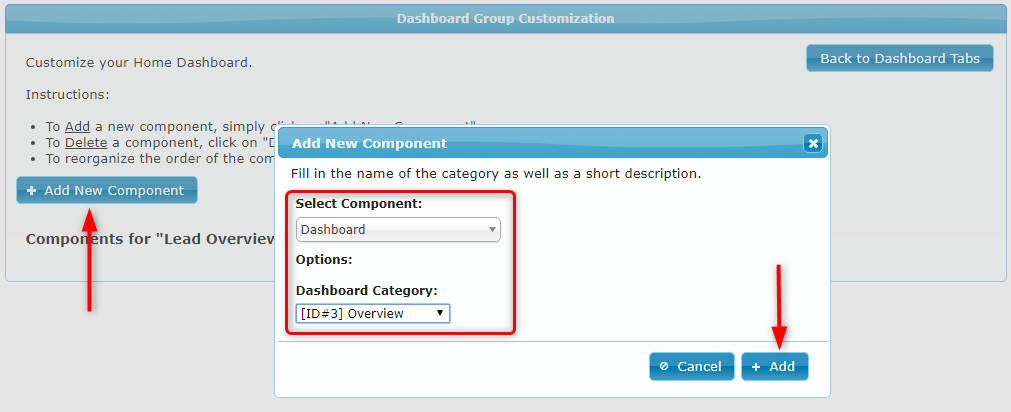
6. On the next page click Add New Component, and in the popup which appears select the Dashboard component, and the new Dashboard Category that you created. When finished, click Add:
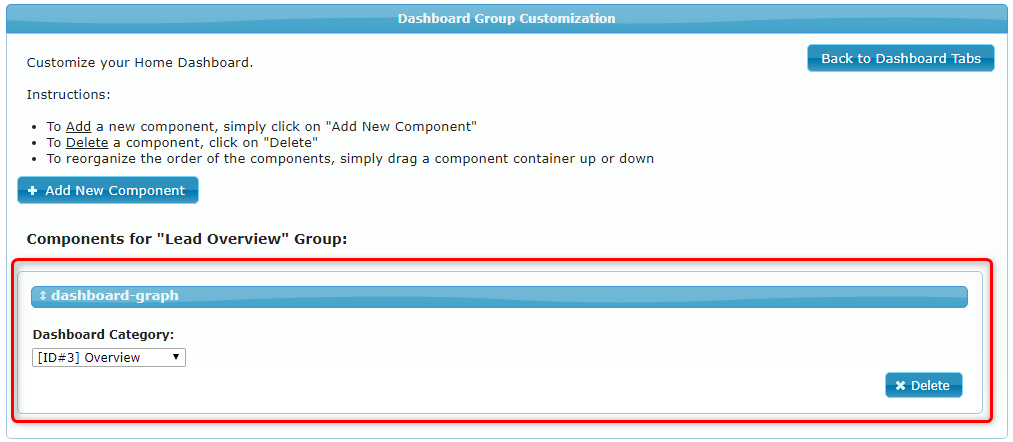
7. Your new dashboard will now appear in the list of components which are shown on the selected Home Page tab:
8. Finally, go to your Home Page and verify that the new dashboard is displayed correctly on the and on the appropriate tab: